

- Choosing a selection results in a full page refresh.

Couldn't load pickup availability




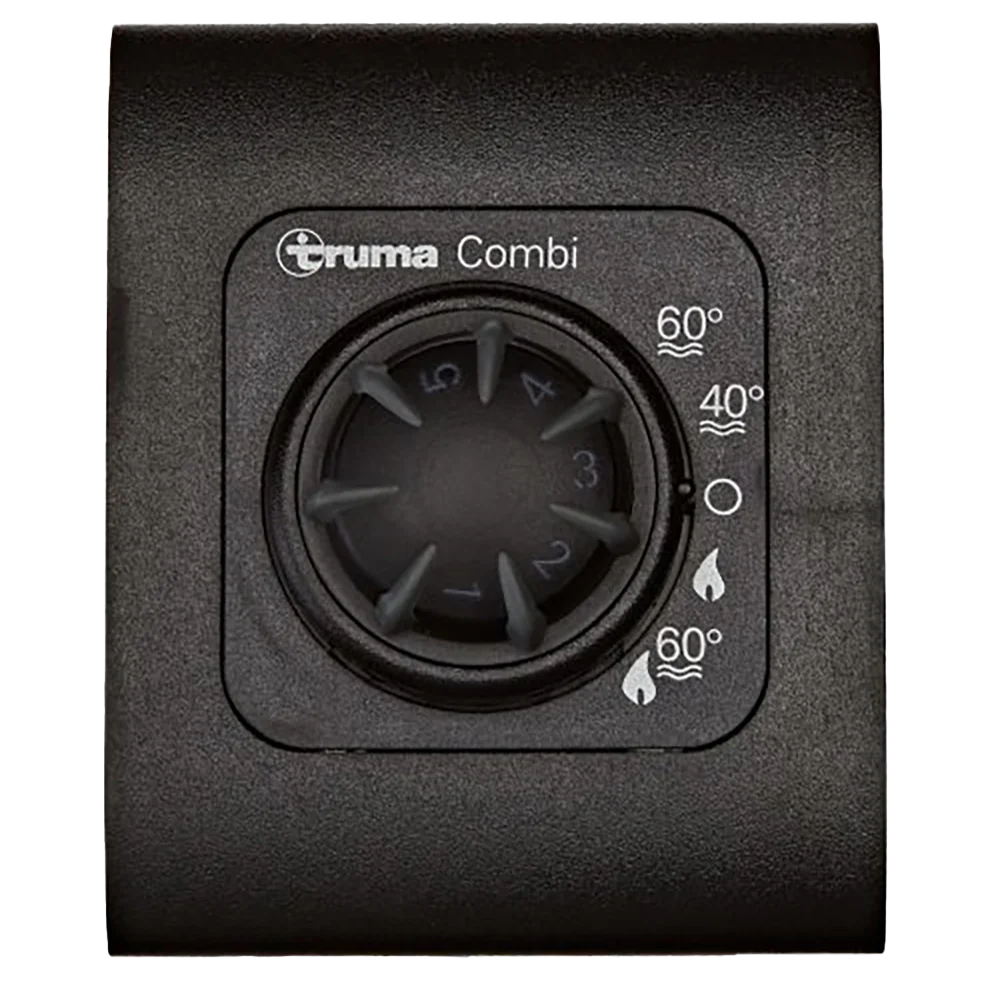
The Truma CP Classic Control Panel (Black) is a genuine Truma control unit designed to operate and monitor Truma Combi heating and hot water systems installed in caravans, campervans and motorhomes. The panel allows you to adjust heating temperature, hot water settings and operating modes through a simple dial-based interface.
This compact control panel is typically fitted inside the vehicle living area and connects to the heater via a data cable, providing convenient control of the Truma Combi system without needing direct access to the heater unit itself.
The CP Classic is commonly used with Truma Combi D6 and D6E heating systems and similar models, making it a popular replacement part when upgrading or replacing an older control panel.
Designed for Truma Combi heaters – compatible with systems such as Combi D6 and D6E.
Simple rotary dial operation – easy to adjust heating and water temperature.
Compact interior control unit – installed inside the caravan or motorhome living space.
Genuine Truma replacement part – ensures reliable compatibility and performance.
Clear system monitoring – lets you manage heating and hot water from one panel.
Control panel for Truma Combi heating systems
Allows temperature and operating mode adjustment
Simple rotary dial interface
Compact wall-mounted design
Suitable for caravans, campervans and motorhomes
Finished in classic black
| Specification | Details |
|---|---|
| Product Name | Truma CP Classic Control Panel |
| Manufacturer | Truma |
| Manufacturer Part Number | 36011-01 |
| Compatible Systems | Truma Combi heaters (e.g. D6 / D6E) |
| Colour | Black |
| Connection | Data cable connection |
| Product Dimensions | Approx. 22.6 × 15.4 × 5.1 cm |
| Product Weight | Approx. 0.19–0.23 kg |
| Vehicle Type | Caravan, campervan, motorhome |
The Truma CP Classic control panel is typically installed inside the caravan or motorhome living area, usually on an interior wall or control panel area where it is easily accessible to the user.
Disconnect the vehicle power supply before starting installation.
Mount the control panel into a cut-out opening in the interior wall panel.
Connect the data cable from the control panel to the Truma Combi heater control system.
Secure the panel using the supplied mounting frame and screws.
Restore power and test heater and hot water functions through the control panel.
The control panel communicates with the heater through the Truma control bus system, allowing the user to control heating and hot water functions remotely from inside the vehicle.
For safety and correct operation, installation should be carried out by a qualified technician or competent installer, especially when working with heating systems.
1 × Truma CP Classic Control Panel (Black)
Mounting frame / housing
Installation instructions
If your original control unit becomes faulty or outdated, replacing it with the Truma CP Classic control panel restores full control of your caravan or motorhome heating system. It provides simple, reliable temperature adjustment and system monitoring, ensuring comfortable heating and hot water control while travelling or camping.
💡 Tip: Use a trim tool to prevent marking the wall panel
🔹 Step 3 – Unscrew the Mounting Plate
4
Remove the visible Torx screws (typically 4–8 screws)
Keep screws safe for reinstallation
👉 Real-world installs confirm multiple Torx screws hold the unit in place
🔹 Step 4 – Pull Panel Forward
Gently pull the control panel out of the wall
Do not yank — cable is attached at the rear
🔹 Step 5 – Disconnect Wiring
4
Locate the RJ-style data cable on the back
Press clip and unplug carefully
This cable connects to the Truma Combi heater system
🔹 Step 6 – Remove the Unit
Panel is now fully free
Inspect wiring and aperture before installing new unit
🔁 Ready for Replacement
When installing a new panel:
Reuse the existing data cable (in most upgrades)
Ensure 12V supply is present
Some upgrades (e.g. digital panels) may require:
Firmware compatibility
PCB upgrade (older systems)
⚠️ Common Mistakes to Avoid
❌ Pulling panel without unplugging cable
❌ Snapping fascia clips (very common)
❌ Forgetting to isolate power
❌ Mixing up screw lengths
💡 Pro Tip (Upgrade Insight)
If you're upgrading (e.g. to CP Plus or iNet):
The opening may need slight enlargement
New panels often use clip-in mounting systems instead of screws
Thanks for subscribing!
This email has been registered!
| Product | SKU | Description | Collection | Availability | Product Type | Other Details |
|---|