


Whale Control Panel For Gas & Electric Space Heater Black - SH0102B
The lead time for this product is approx 6 weeks
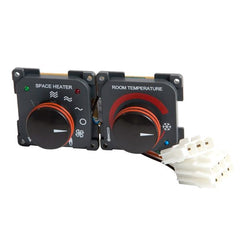
The Whale Control Panel for Gas & Electric Space Heater in black is a user interface designed to operate Whale's gas and electric space heaters, commonly installed in caravans and motor homes. This control panel allows users to select between gas and electric heating modes, adjust temperature settings, and monitor the heater's status, ensuring efficient and convenient operation.
Specifically, this control panel is compatible with Whale's gas and electric space heaters, such as the SH4312B model. It provides a straightforward means to manage the heater's functions, enhancing user experience and comfort during travel.
Where This Goes
This control panel is used with a Whale gas & electric space heater (e.g., Whale Mk II / SH2202 series) — the thermostat-style interface that lets the user select heat source (gas or electric), adjust temperature and operate the heater from inside the living space of a caravan, motorhome, campervan or RV.
Mount location:
-
Interior wall/panel in the habitation area — typically in the lounge or hallway at a comfortable reach (~1.4–1.6 m above floor level) and clear of drafts or heat sources.
-
Near the vehicle’s wiring loom access so the panel cable can be routed without sharp bends.
How It Is Fitted
Before You Start
✔ Disconnect battery/12 V power while working on the wiring to avoid short circuits.
✔ Choose a flat vertical surface where the panel will be easy to view and reach.
✔ Tools needed: drill with bits, pilot drill, screwdriver, file for panel cut-out.
Step-by-Step Fitting
-
Mark the Cut-Out
-
On the chosen wall/panel, mark a cut-out of approx. 95 mm (W) × 42 mm (H) for the control panel body (confirm exact dimensions with your component).
-
-
Cut the Opening
-
Carefully cut the marked opening using a jigsaw or panel saw.
-
File any rough edges so the panel fits cleanly.
-
-
Feed the Cable
-
Route the heater control loom cable from the space heater to the cut-out.
-
Leave enough cable to comfortably connect the panel.
-
-
Insert the Panel
-
Push the control panel into the cut-out from the front.
-
It should clip into place or rest flush depending on the mounting style.
-
-
Secure with Screws
-
Use the provided screws (typically No.4 x ¾″) to fix the panel in place behind the surround frame.
-
-
Connect Wiring
-
Connect the panel’s loom to the heater’s control cabling harness as per the heater’s wiring diagram.
-
Ensure correct orientation of 12 V power, ground and communication connectors (follow the heater installation manual).
-
-
Restore Power & Test
-
Reconnect 12 V power.
-
Turn on the heater and confirm the panel displays correctly and controls gas/electric modes as expected.
-
Quick Fit Notes
-
Mount type: Flush-mount control panel for Whale gas & electric space heaters
-
Location: Interior wall/panel in carriage/living area
-
Panel cut-out: Approx. 95 × 42 mm; confirm with actual part dimensions
-
Connections: Fits to heater loom/cabling from space heater
-
Power: 12 V DC control feed (via heater harness)
-
Installation: Secure with screws and wiring connectors; test after installation
Pro Tip: Mount the panel away from direct heat sources or drafts so temperature readings are accurate and controller response is consistent.
Control Panel Cut-Out Dimensions (Flush Mount)


4
Cut-out size (approx.):
-
Width: 95 mm
-
Height: 42 mm
Installation notes
-
Flush-mounts into an interior wall or furniture panel.
-
Allow clearance behind the panel for the wiring loom (avoid sharp bends).
-
Panel sits flush once clipped/screwed into place.
-
Confirm dimensions against the supplied panel before cutting.
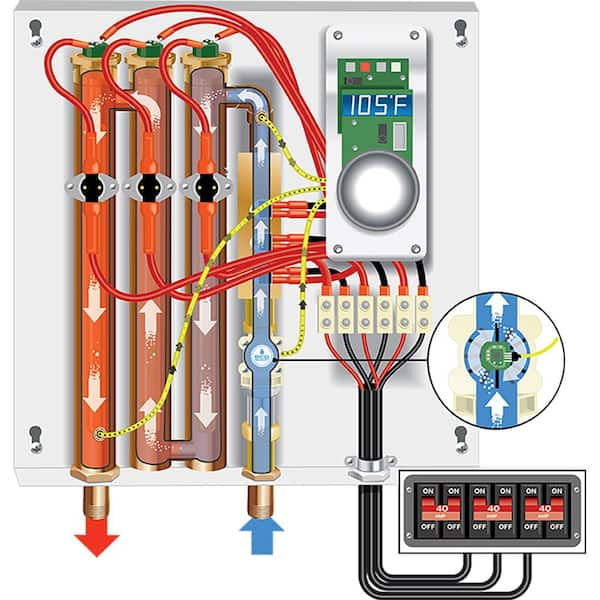
Wiring Connection Map (Overview)


4
Connection overview
-
The control panel connects to the Whale space heater via a pre-terminated control loom.
-
Typical connections carried in the loom:
-
12 V DC supply (from heater)
-
Ground / negative
-
Control & communication lines (mode selection, thermostat signals)
-
-
Plug-and-play connection at the heater end (no direct mains wiring at the panel).
Safety & best practice
-
Isolate 12 V power before wiring.
-
Route the loom away from hot air ducts and sharp edges.
-
Secure the cable to prevent vibration wear.
-
After installation, power up and function-test gas and electric modes.
Quick Installer Checklist
-
□ Confirm cut-out size before cutting
-
□ Mount panel away from drafts/heat sources
-
□ Connect loom securely to heater
-
□ Restore power and test all functions
- Choosing a selection results in a full page refresh.