


- Choosing a selection results in a full page refresh.


Couldn't load pickup availability


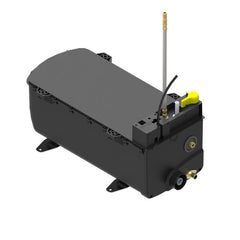
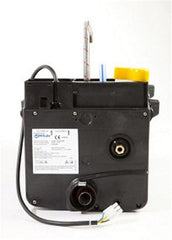
Onboard Gas and Electric Water Heater with Whale® Water Heater Control Panel.
8 litre capacity hot water system designed for caravans, motorhomes, campervans and panel vans. This versatile water heater can be powered by LPG gas, 12 V DC, or 230 V AC electric, giving you flexible hot water options on or off campsite hook-ups. It includes a balanced flue system for efficient combustion and flexible installation through the floor.
Built with robust insulation and a compact design, the Expanse delivers hot water quickly with excellent retention while preserving precious interior space.
Dual-fuel operation: Runs on LPG gas or electric (12 V/230 V) for versatile hot water supply.
8 litre hot water capacity: Provides sufficient hot water for showers, sinks and daily use.
Balanced flue system: Efficient combustion and flexibility in routing flue through the floor.
Fast heat-up & good retention: Premium insulation helps maintain water temperature longer.
Winter protection mode: Helps prevent freezing in cold weather.
Compact & lightweight: Designed for installation where interior space is at a premium.
1 × Whale Expanse Onboard Water Heater (8 L capacity)
1 × Control panel
1 × 3.5 m connection cable
1 × Flue kit (approx. 1.25 m)
3 × Flue brackets
1 × End flue bracket
(Standard kit contents for SETWL8202A onboard units)
| Specification | Details |
|---|---|
| Model | Expanse Onboard Gas & Electric Water Heater |
| Part No. | SETWL8202A |
| Water Capacity | 8 litres (≈2.1 US gal) |
| Fuel Type | Butane/Propane 30 mbar + Electric |
| Electric Supply | 12 V DC & 230 V AC |
| Electric Heat Output | 750 W (eco) / 1500 W (high) |
| Max Water Temp | ~72 °C |
| Max Water Inlet Pressure | 1.9 Bar |
| Pressure Relief Valve Setting | 3.0 Bar |
| Gas Connection | 8 mm compression fitting |
| Current Draw (12 V) | ~0.48 A standby |
| Current Draw (230 V) | ~6.5 A max |
| Flue System | Balanced flue with intake/exhaust |
| Installation | Internal with flue through floor |
| Weight | ~5.4 kg |
| Dimensions | ~262 × 522 × 252 mm |
| (Typical specs from multiple retailer listings) |
Caravans & motorhomes
Campervans & van conversions
Onboard hot water provision from LPG and/or electric
Users wanting a compact, high-performance hot water system with flexible power options
Must be installed and serviced by a qualified gas engineer in line with safety standards.
Flue must be routed through the vehicle floor in accordance with installation requirements and safety clearances.
If connecting to mains water supply, ensure a pressure regulator is used so inlet pressure does not exceed 1.9 Bar.
Thanks for subscribing!
This email has been registered!
| Product | SKU | Description | Collection | Availability | Product Type | Other Details |
|---|