


- Choosing a selection results in a full page refresh.

Couldn't load pickup availability


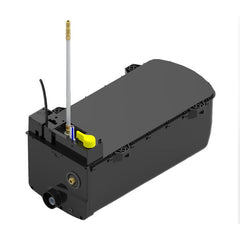
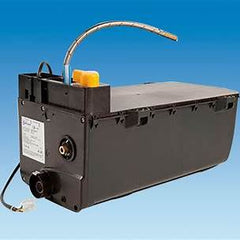
Underfloor Gas and Electric Water Heater (Install with Whale iVan® Control Panel).
The Whale Expanse Underfloor Water Heater (SETWL8212A) is a premium dual-fuel solution for caravans, motorhomes, and camper vans. Designed for underfloor installation, it combines gas and electric heating with a complete balanced flue kit, giving you reliable hot water whether you’re hooked up or off-grid. Its compact dimensions maximise internal space while delivering efficient performance.
Dual Fuel Flexibility: Run on LPG gas off-grid or switch to electric power when connected to mains.
Space-Saving Underfloor Fit: Keeps interior storage and living space free.
Complete Kit Supplied: Balanced flue, cable and brackets included — no need for additional accessories.
Easy Control: Supplied with a plug-in control panel for simple temperature adjustment.
Reliable Performance: Trusted design from Whale, a leader in caravan water systems.
Gas & Electric Operation – Efficient hot water on gas (butane/propane) or electric 12 V / 230 V.
Balanced Flue System – Neat exterior venting with included flue components.
Compact Design – Ideal for underfloor installation in caravans and motorhomes.
User-Friendly Control Panel – Temperature selection and mode control made simple.
Frost & Safety Features – Protects system in cold conditions and includes necessary safety valves.
| Specification | Details |
|---|---|
| Capacity | 8 Litres |
| Gas Type | Butane/Propane (30 mbar CAT I3B/P) |
| Electric Modes | 750 W – 1500 W |
| Max Inlet Pressure | 1.9 bar |
| Pressure Relief Setting | 3.0 bar |
| Current Consumption | ~0.48 A (12 V DC), ~6.5 A (230 V AC) |
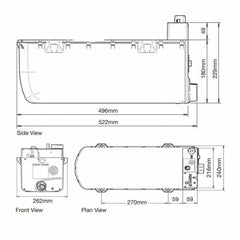
| Dimensions (H×W×L) | 180 × 262 × 522 mm |
| Gas Connection | 8 mm compression |
| Installation | Underfloor with balanced flue |
✅ Whale Expanse 8 L Water Heater Unit
✅ Plug-in Control Panel
✅ 3.5 m Control Cable
✅ Balanced Flue Pipe (1.25 m)
✅ Flue Mounting Brackets (×3)
✅ End Flue Bracket
✔ Hot Water Anywhere — Gas for wild camping, electric for powered pitches.
✔ Maximises Interior Space — Underfloor installation frees up cupboards and seating.
✔ All-In-One Kit — No need to source separate flue parts or controls.
✔ Simple Operation — Clear control panel with easy temperature selection.
✔ Durable & Reliable — Built to perform in varied weather and touring conditions.
Caravan owners wanting a permanent onboard hot water system
Motorhome and camper van conversions requiring efficient space use
Travellers who switch between campsites and remote locations
Installation must be performed by a qualified gas engineer following manufacturer guidance. The balanced flue must be fitted with correct clearances and venting for safe operation.
Thanks for subscribing!
This email has been registered!
| Product | SKU | Description | Collection | Availability | Product Type | Other Details |
|---|