Whale Space Heater Mk2 Gas & Electric - SH2202

Whale Space Heater Mk2 Gas & Electric - SH2202 The Whale Space Heater Mk2 Gas & Electric...
SKU: SH2202
Availability: In Stock
Product Type: Heaters
Subtotal: £788.34
  • Caravan-Life
  • Caravan-Life
  • Caravan-Life
Whale Space Heater Mk2 Gas & Electric - SH2202

Whale Space Heater Mk2 Gas & Electric - SH2202

£788.34

Whale Space Heater Mk2 Gas & Electric - SH2202

£788.34

Whale Space Heater Mk2 Gas & Electric - SH2202

The Whale Space Heater Mk2 Gas & Electric is a compact, lightweight heating solution designed for caravans and motorhomes. It offers dual-fuel operation, utilizing both gas and electric power sources to provide efficient and flexible heating options.

Where does it go?

https://theleisurewarehouse.co.uk/cdn/shop/products/sh22111_1fb29f15-06c7-4920-8f5b-55746eb1b0a3.jpg?v=1463499097
https://static-data2.manualslib.com/product-images/4ab/1763885/whale-sh2202-heater.jpg
https://ukcampingandleisure.co.uk/cdn/shop/files/52f83851-940b-4b5d-89a0-5d6162c5779d_512x512.jpg?v=1711989205
4

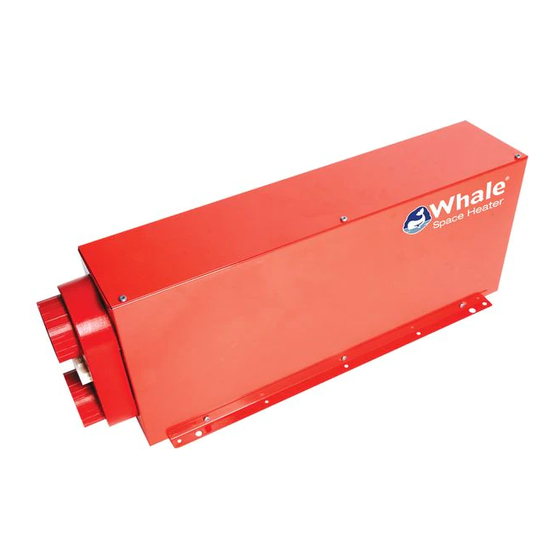
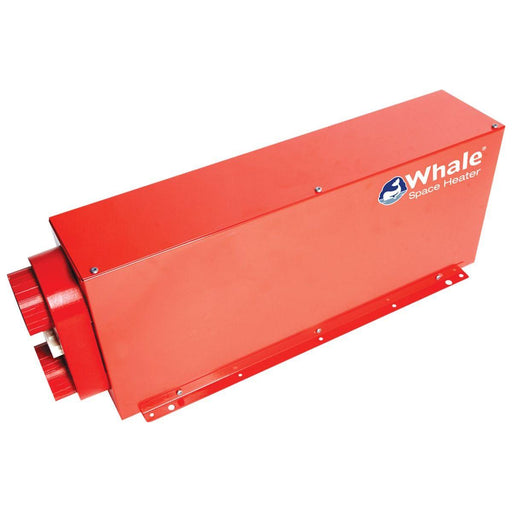
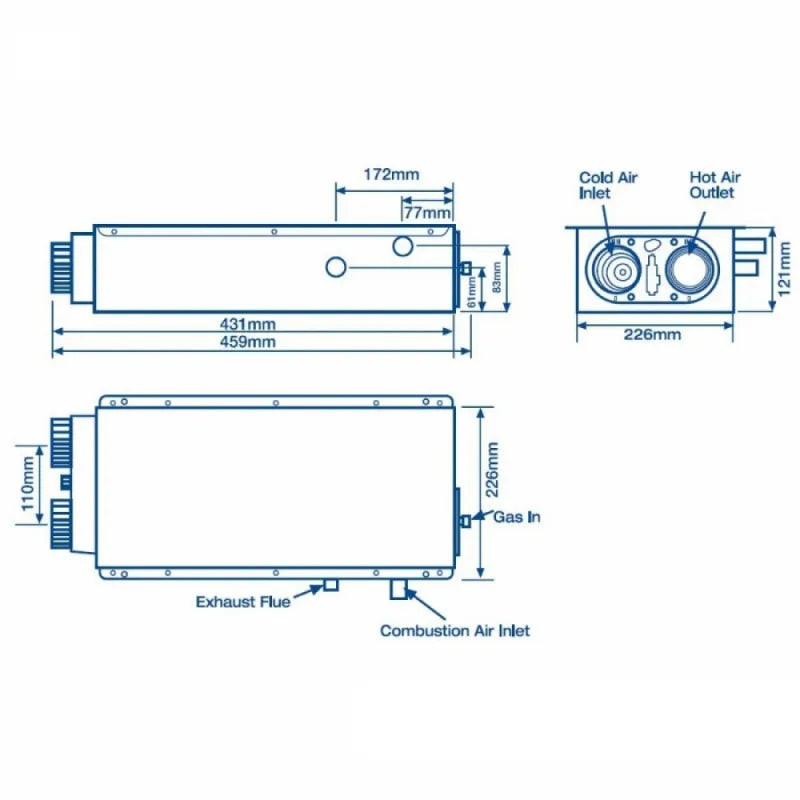
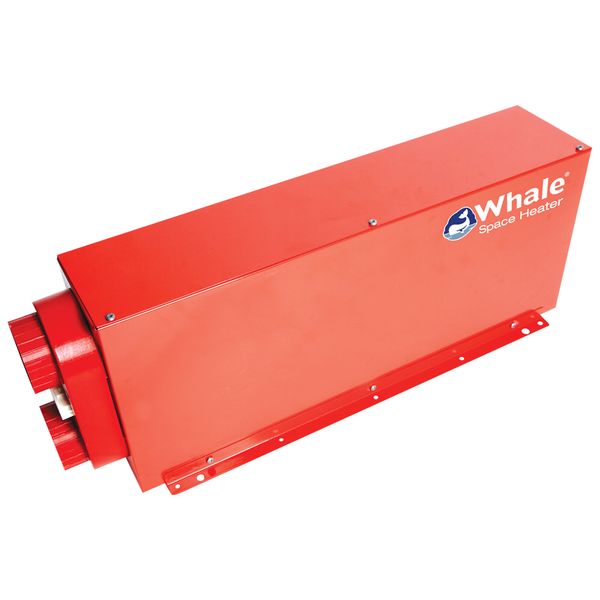
The Whale Space Heater Mk2 Gas & Electric (SH2202) is installed inside a caravan, motorhome or campervan, usually out of sight under a seat, bed, or cupboard.
It provides space heating and blown warm air to the living area via ducting outlets.

The heater connects to:
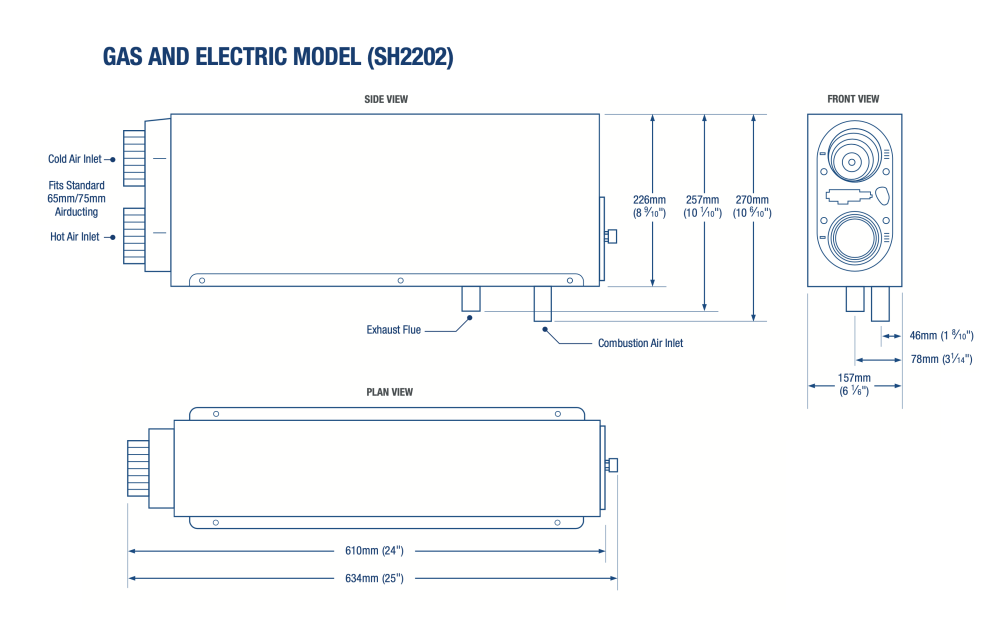
  • LPG (gas) supply

  • 230 V electric (for electric heating mode)

  • 12 V power (for controls and fan)

  • Warm air ducting to vents around the vehicle

It is a fixed appliance and forms part of the vehicle’s permanent heating system.

Typical installation locations:

  • Under a bench seat

  • Under a bed base

  • In a low-level cupboard or service locker

Installed in vehicles using **Whale heating systems.


How is it fitted

Important safety notice:
Installation involves gas, 12 V and 230 V electrical connections and must be carried out by a qualified/competent installer in accordance with local regulations.


Before you start

  • Isolate LPG supply, 12 V battery, and 230 V mains.

  • Confirm there is adequate ventilation and clearance around the heater.

  • Ensure the mounting surface is flat, rigid and level.

  • Tools typically required: drill, screwdriver, spanners, hole saw (for ducting), gas-rated fittings.


Step-by-step fitting

  1. Position the heater

    • Place the heater in the chosen location with the air outlet ports facing the ducting routes.

    • Ensure required clearances are met around the casing.

  2. Secure the heater

    • Fix the heater base to the floor or mounting panel using the manufacturer’s fixing points.

    • Ensure the unit is stable and does not move during travel.

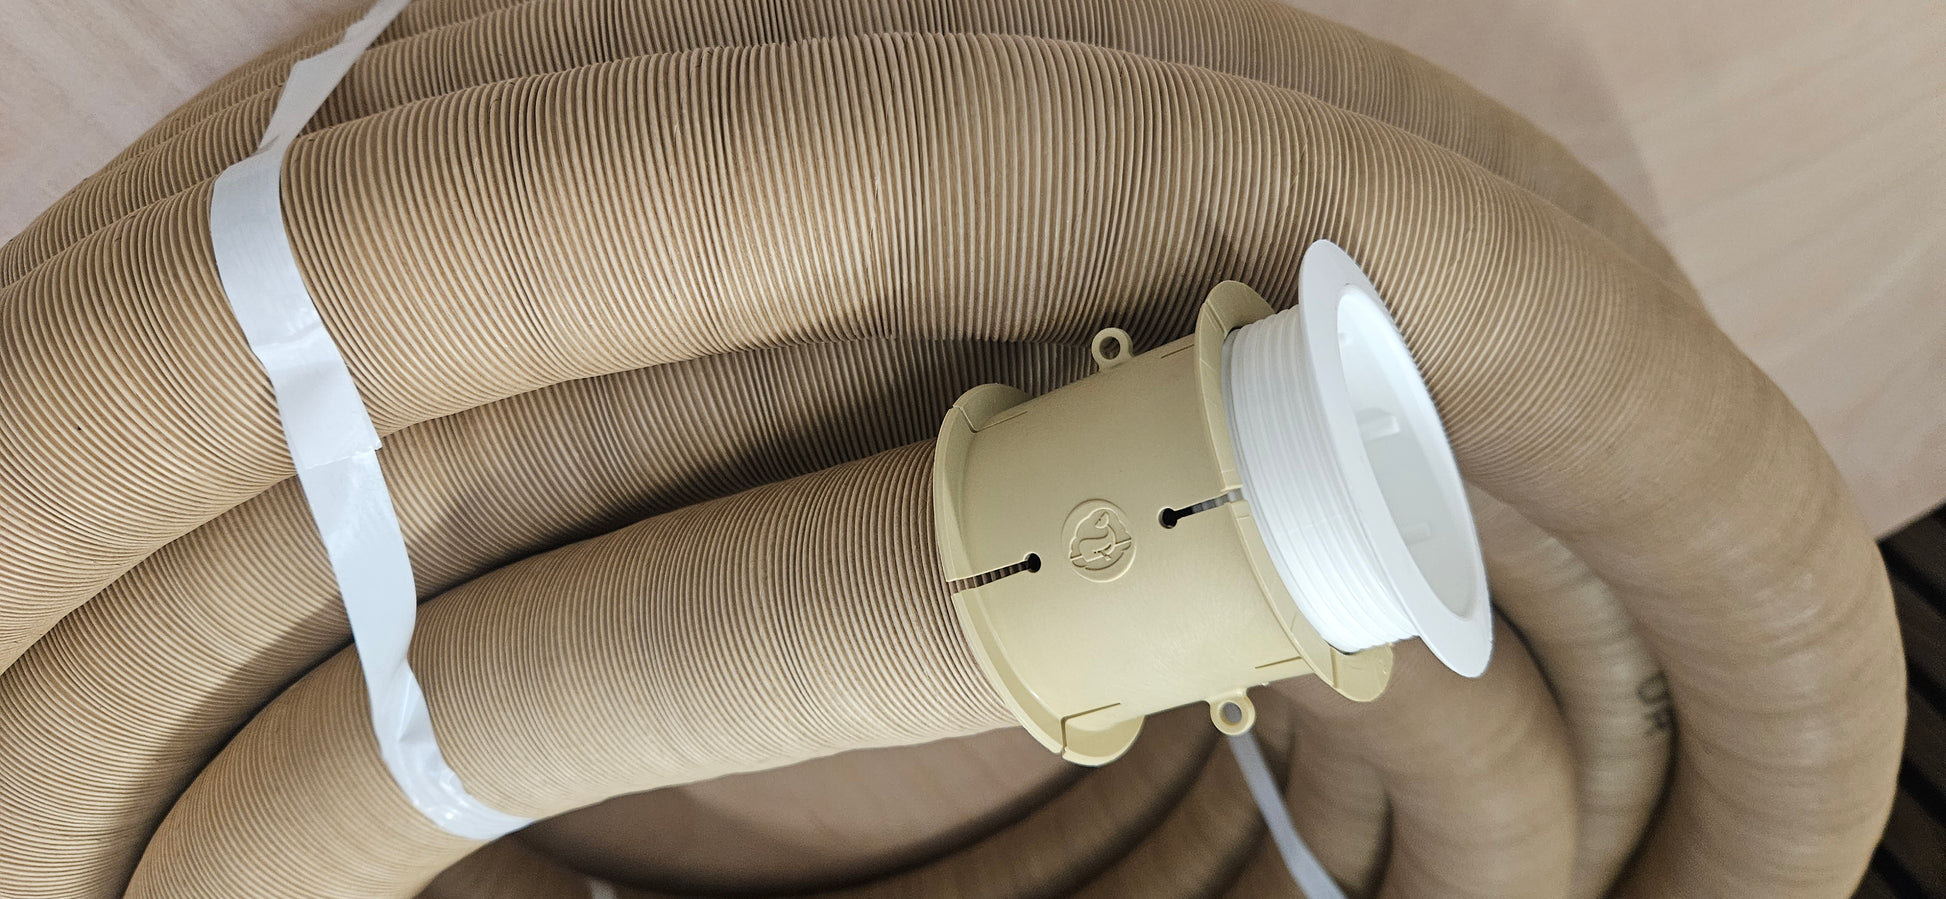
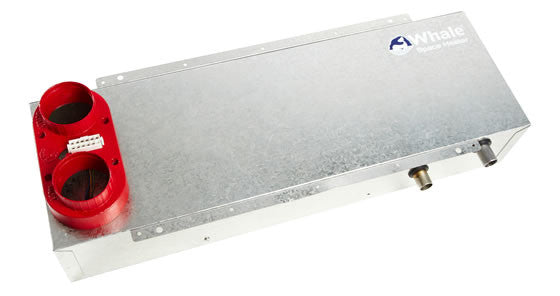
  3. Connect warm air ducting

    • Attach Whale warm air ducts to the heater outlets.

    • Route ducting to interior vents, keeping runs as short and straight as possible.

    • Secure ducts with clips and avoid crushing or tight bends.

  4. Connect gas supply

    • Connect the heater to the LPG supply line using approved gas fittings.

    • All gas work must be pressure tested after installation.

  5. Connect electrical supplies

    • 12 V DC: supplies the fan and controls.

    • 230 V AC: powers the electric heating element.

    • Follow the Whale wiring diagram precisely and secure cables away from heat sources.

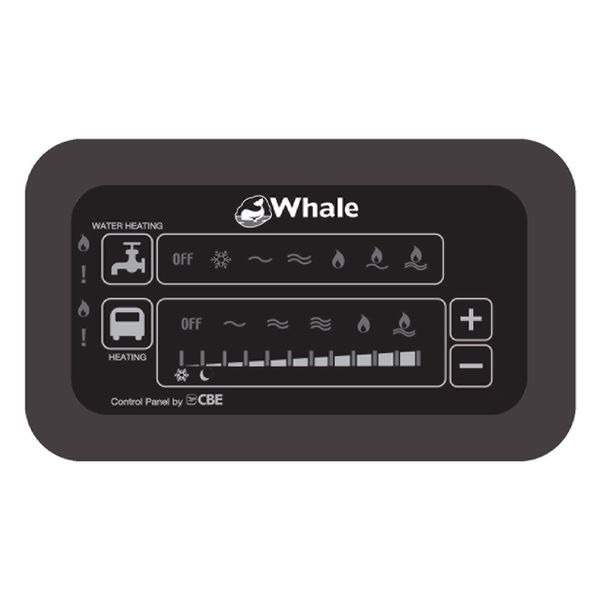
  6. Install the control panel

    • Fit the Whale control panel to an interior wall and connect it to the heater using the control loom.

    • This allows mode selection (gas/electric) and temperature control.

  7. Final checks & commissioning

    • Restore gas and electrical supplies.

    • Test operation on:

      • Gas mode

      • Electric mode

      • Fan and thermostat control

    • Check airflow at all vents and confirm safe operation.


Quick fit notes

  • Product type: Gas & electric blown-air space heater

  • Model: Whale Space Heater Mk2 (SH2202)

  • Installation location: Under-seat / under-bed / cupboard

  • Connections required: LPG, 12 V DC, 230 V AC

  • Air distribution: Warm air ducting to interior vents

  • Control: Remote Whale wall-mounted control panel

  • Installation: Professional / competent installer required


Pro tip

For best heating performance, keep duct runs short and evenly balanced, and position vents to promote good airflow throughout the vehicle.


Below is a complete, website-ready visual support pack for the Whale Space Heater Mk2 Gas & Electric (SH2202).


Cut-Out & Clearance Diagrams

https://rvmega.co.nz/cdn/shop/files/8015051_5.jpg?v=1753236494&width=1200
https://energylibrary.tesla.com/docs/Public/EnergyStorage/Powerwall/%2B/InstallManual/BackupSwitch/en-us/GUID-9BE94B7F-9877-48F6-81B1-13471DDB93B6-online-en-US.png
https://cdn11.bigcommerce.com/s-fkhd5nhp/images/stencil/1280x1280/products/2191/8955/whale-Expanse-Water-Heater-End-Dimensions__27655.1541073905.jpg?c=2
4

Minimum installation clearances (typical guidance)

  • Sides: ≥ 10 mm

  • Rear: ≥ 10 mm

  • Top: ≥ 50 mm (for airflow & servicing)

  • Front: Clear access for ducting & service

Installer notes (ideal as captions):

  • Mount on a flat, rigid surface

  • Do not install directly against soft furnishings

  • Allow space for duct bends and wiring access

  • Maintain ventilation around the heater casing


🌬 Warm-Air Ducting Layout Examples

https://camperselect.co.uk/wp-content/uploads/2022/06/SETSL6511A_4.jpg

https://thevanbuild.co.uk/cdn/shop/files/20251016_092416.jpg?v=1760604629&width=1946
4

Recommended ducting practices

  • Use Whale-approved ducting only

  • Keep runs short and straight

  • Avoid tight bends (minimum bend radius recommended)

  • Balance airflow by spacing vents evenly

Typical layouts:

  • 2–4 vents distributed across lounge, sleeping area & washroom

  • Main run forward, secondary branch to rear

  • Avoid dead-ends or crushed ducting

Performance tip:
Uneven heating is usually caused by overlong ducts or sharp bends.


🔌 Electrical & 🔥 Gas Connection Schematics (Simplified)

https://static-data2.manualslib.com/product-images/4ab/1763885/whale-sh2202-heater.jpg
https://www.plsgroup.co.uk/graphics_cache/c/2/8098104-sh2202_2-2-3-1000.png
https://www.propexleisure.co.uk/wp-content/uploads/2024/10/AK1272-1.jpg
4

Electrical connections

  • 12 V DC: fan & control electronics

  • 230 V AC: electric heating element (1.5 kW)

  • Control loom: links heater to wall-mounted control panel

No mains wiring at the control panel itself.

Gas connection

  • Connects to vehicle LPG system

  • Use approved gas-rated pipe & fittings

  • Must be pressure tested after installation

⚠️ Gas & mains electrical work must be carried out by a qualified installer.


🎛 Combined Water + Space Heater Control Layout Guide

https://d1blekj7w4kc3j.cloudfront.net/images/presets/product_page_normal/catalogue/products/83404.jpg
https://www.justkampers.com/media/videos/thumbnails/Whale_Water_Heater_Thumbnail.jpg
https://d1blekj7w4kc3j.cloudfront.net/images/catalogue/products/83404.jpg

Recommended interior layout

  • Mount Space Heater Control Panel and Water Heater Control Panel together

  • Height: 1.4–1.6 m from floor

  • Same wall or furniture panel for clarity

Why this layout works

✔ Intuitive user control
✔ Cleaner wiring routes
✔ Easier fault-finding
✔ Consistent temperature sensing

Best practice:

  • Keep panels away from doors, windows & heat sources

  • Leave slack cable behind panels for servicing


Installer Quick-Check Sidebar 

  • □ Heater mounted level & secure

  • □ Clearances respected

  • □ Ducting balanced and unclipped

  • □ Gas tested & certified

  • □ Electrical supplies protected

  • □ Controls tested in gas & electric modes

  • Type: Space Heater
  • Manufacturer: Whale
  • Part Number: SH2202
  • Related Products

    Recently Viewed Products